InDesign Tables: A Practical Guide from Import to Print
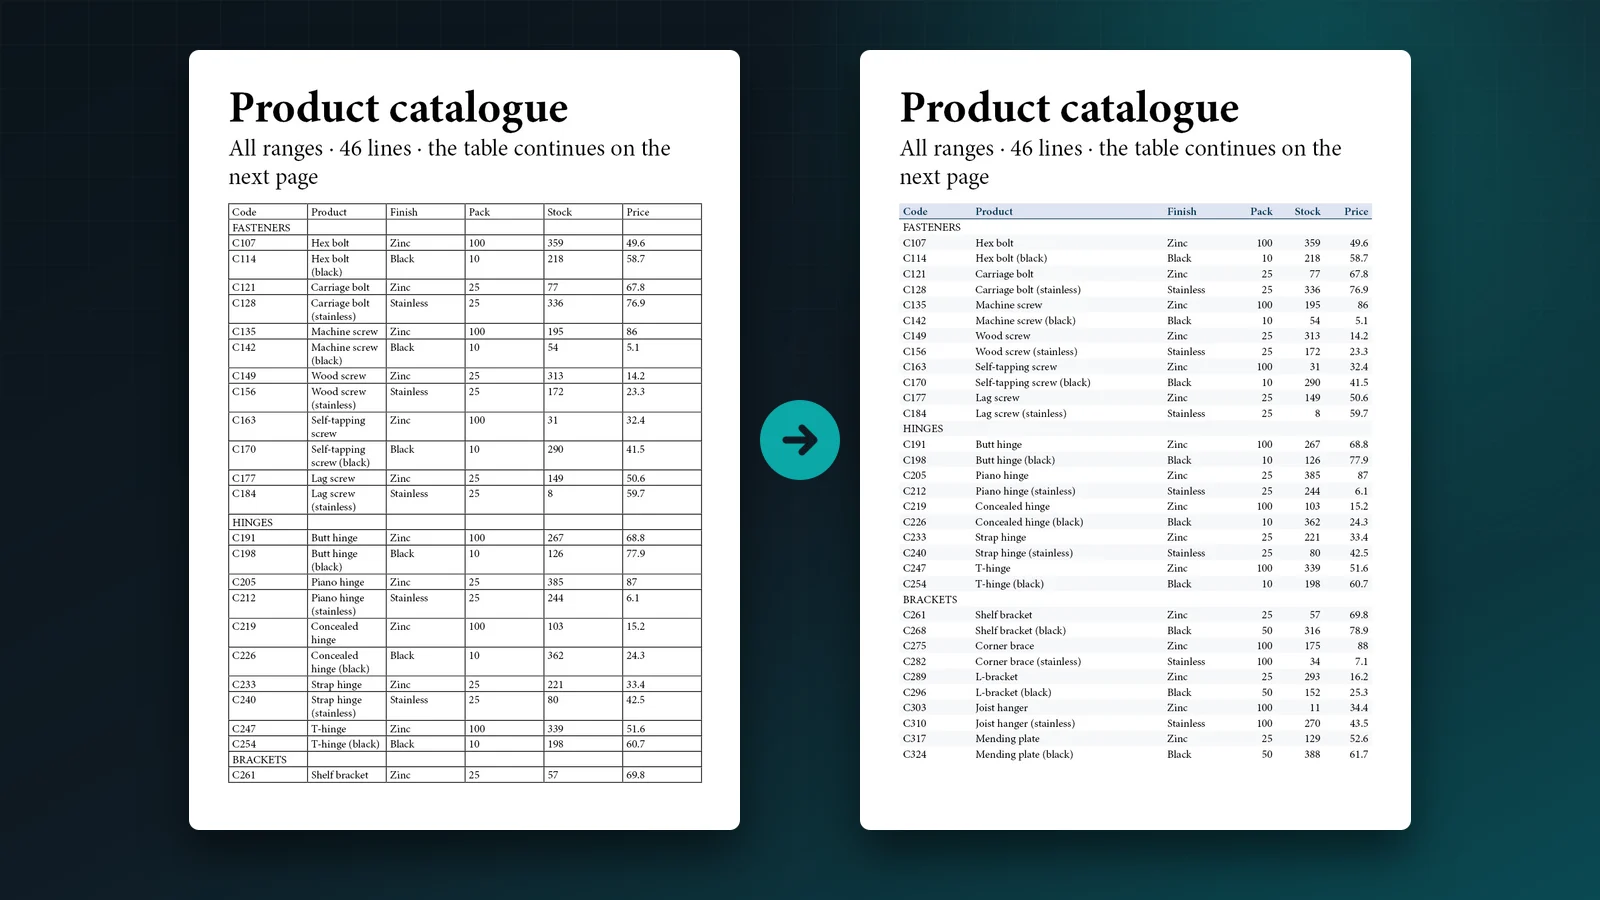
Tables carry the facts in catalogues, price lists, data sheets and reports, and they are usually the part of a layout that changes last. This guide follows a table through its life in InDesign: getting the data in, giving it a consistent look, making it fit the page, and keeping it right when the numbers change. Each section links to a detailed tutorial.
The same catalogue page before and after: default grid, then styled header, fitted columns and banded rows.
1. Get the data into a table
There are three common starting points:
- Insert an empty table. Click in a text frame and choose Table > Insert Table. Set the number of body rows, columns and header rows, and pick a table style if you have one.
- Convert text. Paste tab-separated text, select it and choose Table > Convert Text to Table. Each tab starts a new cell and each paragraph a new row.
- Place a spreadsheet. File > Place an Excel file with Show Import Options ticked to choose the sheet and range, and whether to keep the spreadsheet’s formatting.
Leading zeros and decimal separators are the usual casualties of an import. Check codes such as 0012 and prices such as 4.95 before styling anything. When the only source is a scanned page or a PDF, see how to turn a scanned table into an editable InDesign table.
2. Give it a consistent look with styles
Formatting cells by hand works once. For a document with twenty tables, use the three style levels InDesign provides:
- Paragraph styles for the text inside cells: one for header text, one for body text, one right-aligned for numbers.
- Cell styles for insets, strokes, fills and the paragraph style each kind of cell uses.
- Table styles that bring it together: border, alternating row fills, and which cell style applies to header rows, body rows, the left column and footer rows.
Apply them from Window > Styles > Table Styles and Cell Styles. Changing a style then updates every table that uses it. Use Table > Table Options > Fills for alternating rows rather than colouring every second row by hand.
3. Size the columns to the content and the page
A good table matches the width of the text column, keeps short columns such as codes and prices just wide enough for their values, and lets one column, usually the description, take the rest. InDesign has no single command to fit columns to their content. How to fit table column widths to their content shows the manual method and a one-step alternative.
Never shrink the type to make a table fit. Widen the flexible column, reduce insets in the cell style, or shorten the content instead.
4. Handle tables that run over several pages
Long tables need header rows that repeat wherever the table continues, section headings kept with the rows that follow them, and row heights that can grow. All three are standard InDesign settings. How to make an InDesign table run across multiple pages covers threading, Table > Convert Rows > To Header, repeat options and keep options step by step.
5. Make sure no text is cut off
A small red dot in the corner of a cell means its text does not fit. The usual cause is a row set to an exact height, followed by a maximum height, a column that is too narrow or text that cannot break. Why text disappears in InDesign table cells lists six causes, how to find every clipped cell, and fixes that do not shrink the type.
6. Keep the figures up to date
Prices change after the layout is approved. Copying values by hand is error-prone, and re-placing a linked spreadsheet can replace formatting done in InDesign. How to update an InDesign table from a CSV or Excel file compares four approaches and shows how to prepare the file so codes and decimals survive.
7. Turn table data into charts
A table of figures is often the source of a chart on the same spread. Pasting a chart as a picture from Excel breaks the link with the table and ignores the document’s styles. DataInk draws native, editable InDesign charts from a table, in your swatches and paragraph styles, and updates them when the table changes.
Do the cleanup in one pass
Table Refiner is our InDesign panel for the steps above. Choose a table, give it a look, fit the columns, sort and tidy the rows, set headers and page breaks, check for clipped text and update values from a CSV file. Every change is listed for review before it is applied, and the result stays a normal InDesign table styled with ordinary table, cell and paragraph styles.
Checklist for a finished table
| Check | Where to look |
|---|---|
| Codes keep their leading zeros, prices their decimals | The imported values, before styling |
| Every table uses a table style | Window > Styles > Table Styles |
| The table matches the text column width | Table panel, or the frame edges |
| Header rows repeat on every page | Table > Table Options > Headers and Footers |
| No section heading alone at the foot of a page | Cell Options > Rows and Columns > Keep Options |
| No red overset dot in any cell | Story Editor, page by page |
| Figures match the latest source file | The supplier’s file or spreadsheet |