How to Fit Table Column Widths to Their Content in InDesign
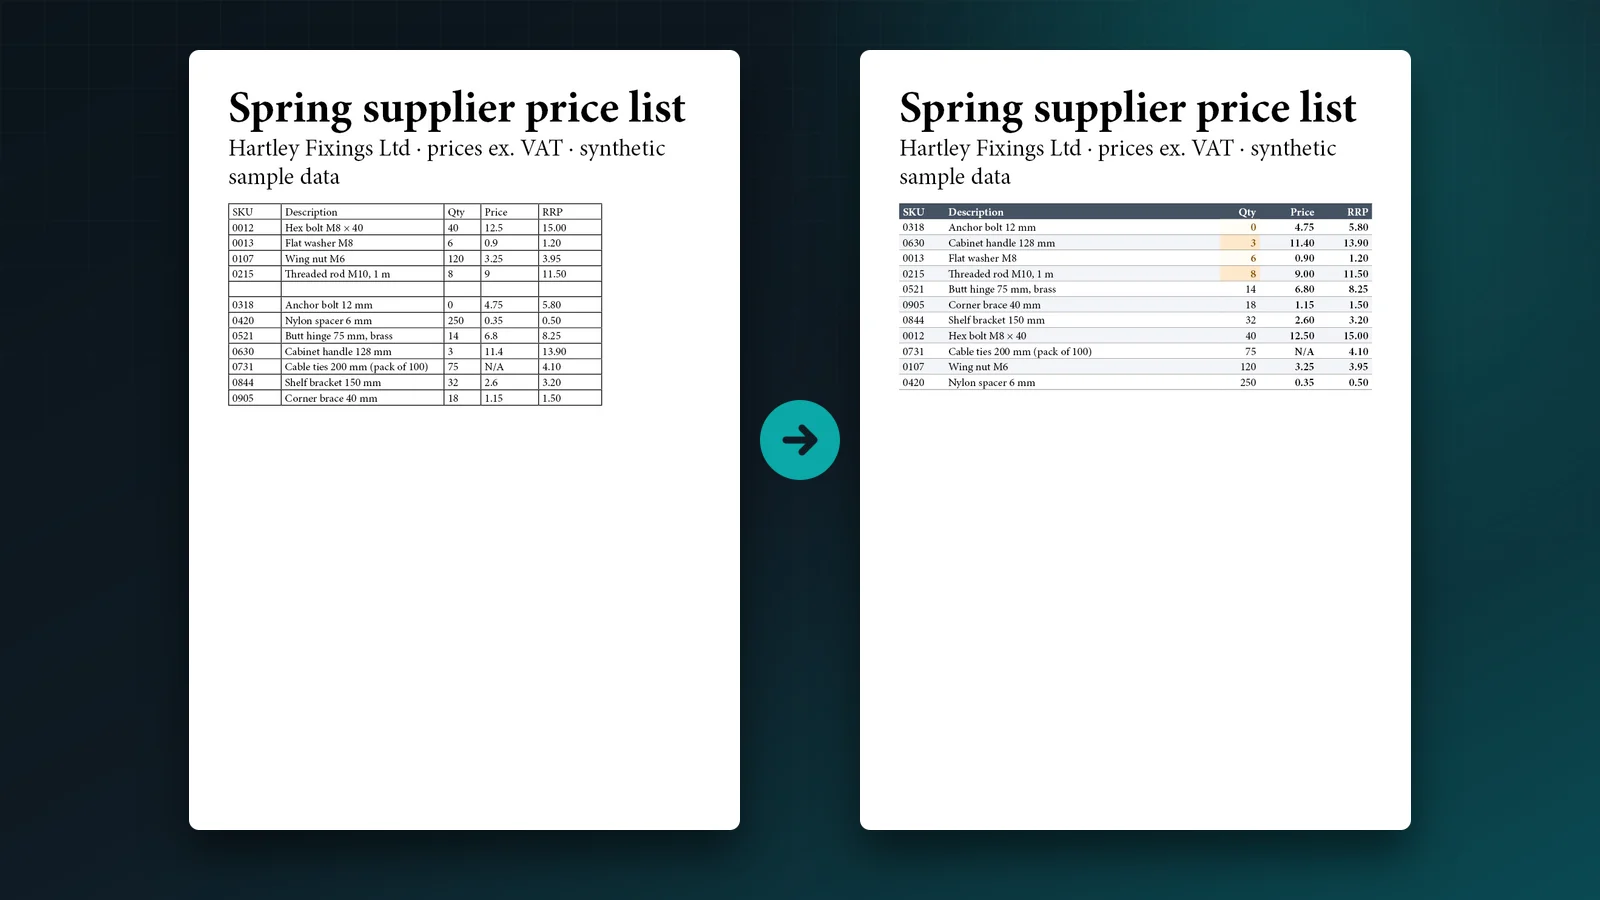
A table placed from Excel or typed quickly arrives with columns of equal width. The SKU column, which holds four digits, is as wide as the description column, whose product names wrap onto two lines. The fix looks obvious, “make each column as wide as it needs”, but InDesign has no single command for it. Here is how to get there by hand, and how to do it in one step.
What a good column width looks like
Before resizing anything, decide what the table has to fit:
- The total width. Most tables should match the width of the text column, so their edges line up with the body text above and below.
- Short columns sized to their content. Codes, quantities and prices should be just wider than their longest value plus the cell insets, and never wrap.
- One flexible column. The description column takes whatever width is left, and is the only one allowed to wrap.
Resizing never means changing the type size. A table set smaller than the body text to make it fit is the first thing a reader notices.
Resize columns by hand
Drag a column edge with the Type tool. On its own, dragging changes that column and the total width of the table. Hold Shift while dragging to move the border between two columns instead: one gets wider, the other narrower, and the table keeps its width.
Type exact widths. Select a column and enter a width in the Table panel (Window > Type & Tables > Table) or in Table > Cell Options > Rows and Columns > Column Width. This is the most precise method once you know the width a column needs.
Distribute evenly. Select several columns and choose Table > Distribute Columns Evenly to give them the same width while keeping their combined width. Useful for a block of number columns such as Qty, Price and RRP.
Fit the table to the text column. If the table is narrower or wider than the frame, widen or narrow its flexible column until the right edge meets the frame edge. With the Shift-drag above, the other columns stay as they are.
A quick method for a typical price list
- Set the short columns first: give SKU, Qty, Price and RRP an exact width that fits their longest value, from the Table panel.
- Make the description column take the rest: Shift-drag its right border until the table’s right edge meets the text frame.
- Check the rows: if a description now wraps, the row grows, as long as its height is set to At Least. See why text disappears in InDesign table cells if a row is set to an exact height.
- Repeat for the next table. There is no way to save these widths and reapply them by column name in InDesign itself: a table style holds strokes, fills and cell styles, but not column widths.
Fit every column in one step with Table Refiner
Table Refiner has a Fit columns window that does the steps above for a whole table, and shows the result before anything changes.
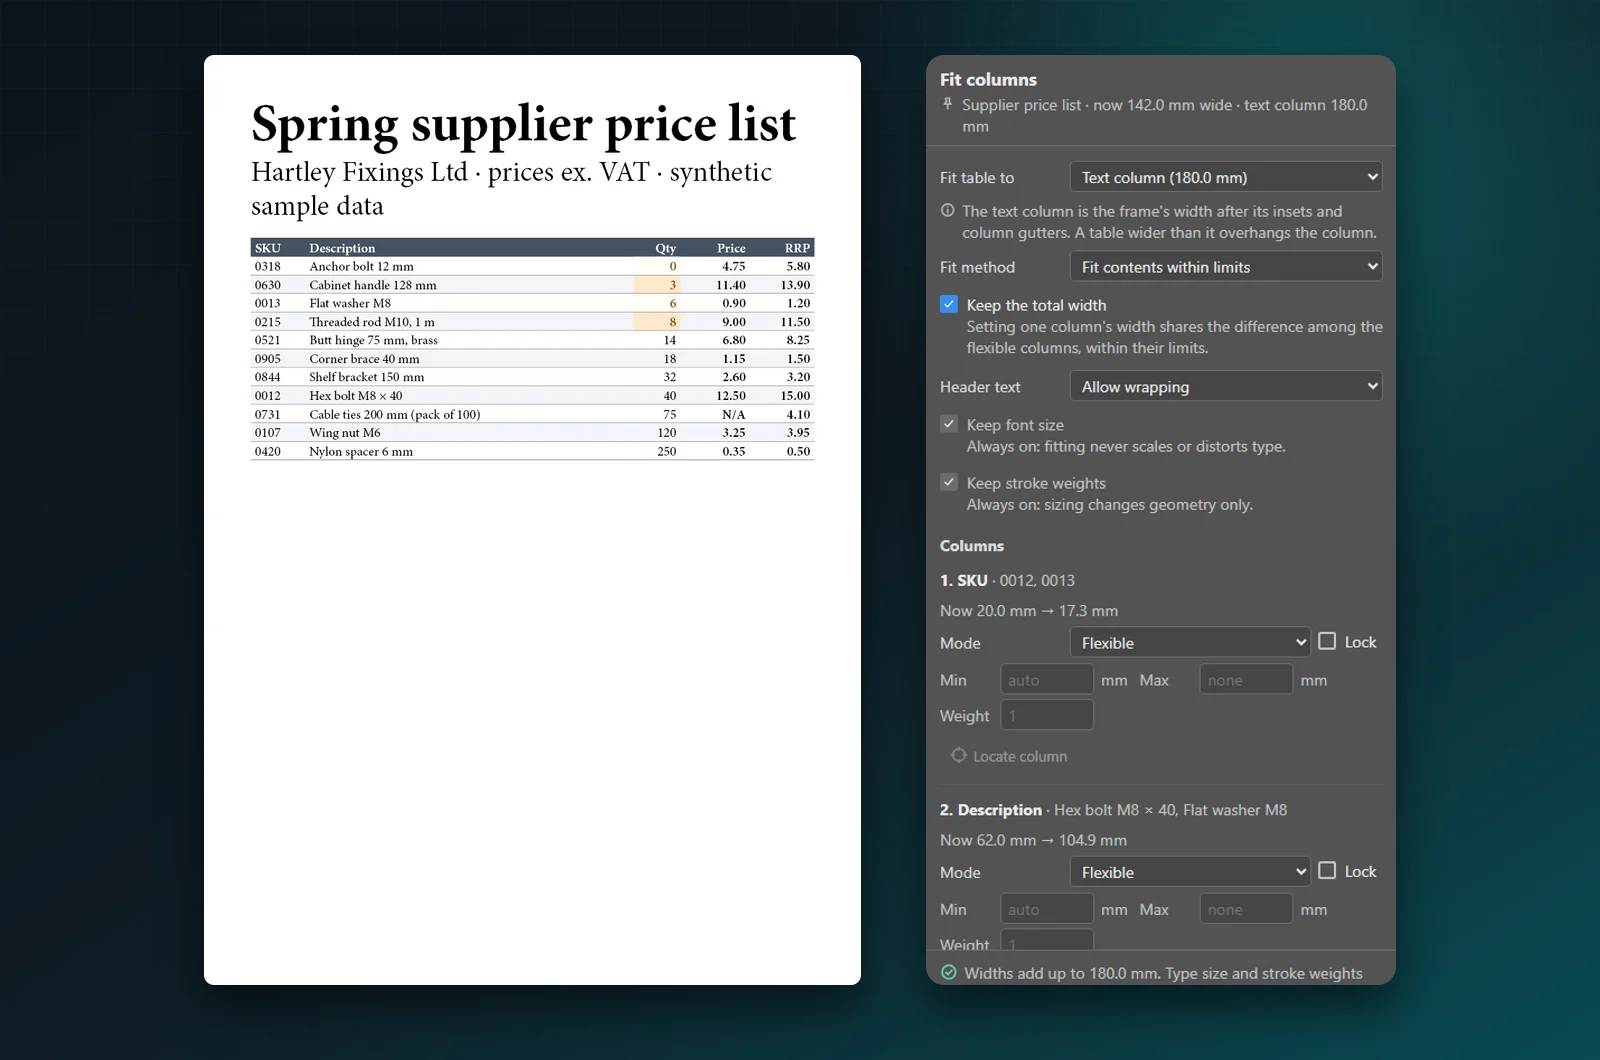
Fit columns: fit the table to the text column, choose per column, and keep the total width.
- Choose the table and set Table width to Text width, Frame or a custom size.
- Open Fit columns…. For each column, choose Flexible (shares the remaining space), Fit content (as wide as its text) or Fixed (a width you type), with an optional minimum and maximum.
- Turn on Keep the total width: changing one column shares the difference among the flexible ones.
- If the columns cannot fit, the panel says by how much, for example Need 196.0 mm; available 184.6 mm, and names the columns causing it. It never shrinks type to make room.
- Review and apply. The widths are saved in a setup you can reuse on the next table, matched by column name rather than position.
Before and after: equal default columns, then every column fitted to its content, with the description taking the rest.